Two ways to reach Roku devices that aren't on your local network: run the RDS Relay Server at the other site for the real devices on its LAN, or add a Roku Cloud Emulator account for cloud-hosted virtual devices. Both appear as Remote Locations in the app and get the same tooling as local devices.
A lightweight Node.js server that runs on a computer at the remote site so Roku Dev Studio can control the real Roku devices on that LAN over the internet — no physical access needed. This tab covers its architecture, setup, capabilities, and API.
roku-dev-studio-api library for discovery and ECP. Local traffic talks to the Roku directly; remote traffic goes through a relay client hosted on the server.git clone https://github.com/paramount-engineering/roku-dev-studio.git
cd roku-dev-studio
npm install
npm run remote-server # listens on port 4951 by defaultnpm install -g roku-dev-studio-remote-server
roku-remote-server # or: roku-remote-server 4951npm run deploy:remote-server # from the repo root → ~/Desktop/RDS-Remote-Server-CopyRebuilds the server and its roku-dev-studio-api dependency into one folder with a local tarball, so npm install --omit=dev on the remote box never needs the unpublished workspace packages. Copy the folder over and follow the README.txt inside it.
4951) on the host running the relayRDS_RELAY_TOKEN=<secret> and every route except /health — the telnet WebSocket upgrade included — requires Authorization: Bearer <secret> or ?token=<secret>; without it, anyone who can reach the port has full control of every Roku on that networkhttp://remote-server-ip:4951)All ECP commands work through the server
Finds every Roku on the remote network
BrightScript console streamed live, plus the 8080 / 8087 system consoles
Sideload dev apps to remote devices
Capture and MITM proxy on the remote LAN, streamed live
Attach, step, breakpoints, and variables over the relay
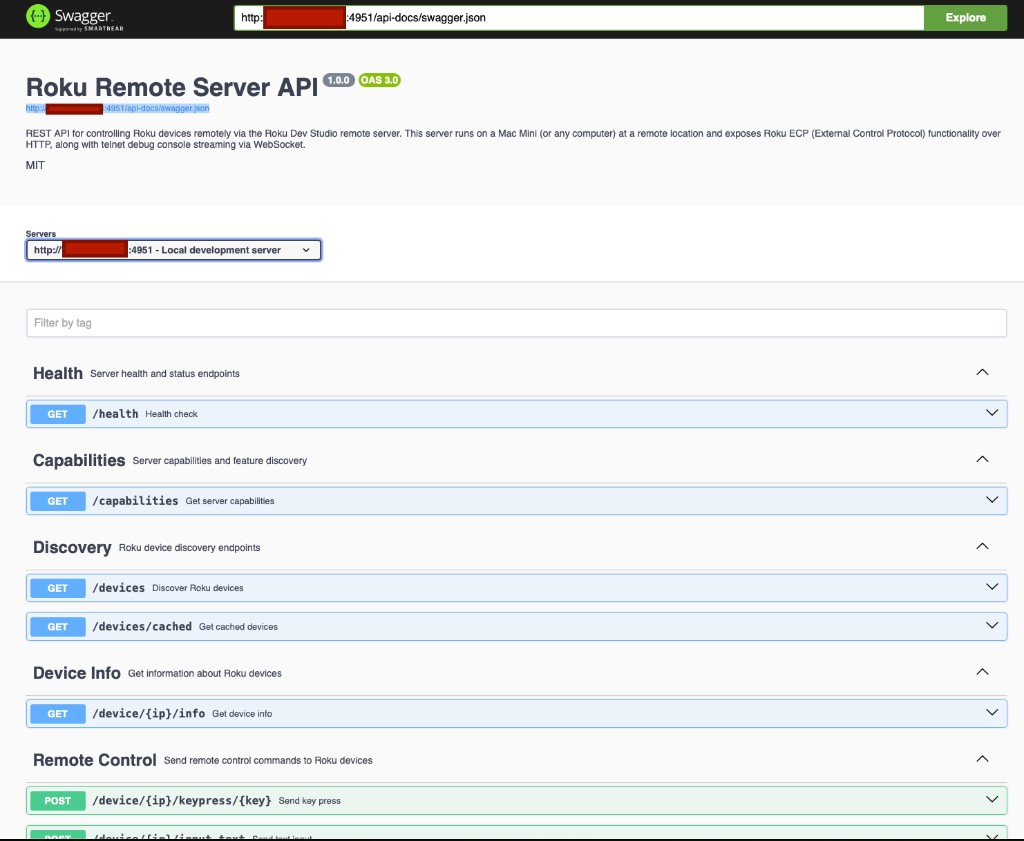
Interactive API documentation, powered by Swagger/OpenAPI 3.0, at http://localhost:4951/api-docs.
Starter service files ship with the package for all three platforms:
com.roku-dev-studio.remote-server.plist)roku-remote-server.service)Full step-by-step service setup, the complete API endpoint reference, and security considerations are in the remote server package README.
Roku's cloud-hosted virtual devices. There is no server to run — Roku Dev Studio talks to the RCE Core API and to each running device's own Device API directly, so a cloud device gets the same tabs as a physical one.
Keypresses, deep links, and queries via the device's ECP proxy
Dev App installs and screenshots via the device's installer
Telnet, the debugger, and RALE over the device's ports bridge
Live device video with volume and mute, plus a screenshots gallery
Client library: roku-dev-studio-rce (Core API + Device API).